Tuesday, March 25, 2014

Papel Picado Lace Curtains


A while back Teresa K asked me to do a filet crochet pattern.  I love Papel Picado, colorful tissue paper cut into patterns and hung up as decoration for Mexican fiestas, so  I decided that a papel picado inspired lace curtain would be just the design that would go well with filet crochet.

I decided to use this particular design for my inspiration.

Papel Picado


Here is a chart of the design.  This is a full size chart and if you right click on the image you should be able to do a Save Image As to save it to your computer and print it out.  If you have trouble doing this, email me at crochetparfaitpg@yahoo.com and I will send you a file copy of the chart, ask for adobe.pdf, picture.png or excel.xlsx.  The excel chart is editable. 


Abbreviations

YO--yarn over       ch(s)--chain(s)       fdc(s)--foundation double crochet     
dc(s)--double crochet(s)             st(s)--stitches

Tips for making this chart

  • Chain loosely, if you chain tightly your work will be uneven.  If you have trouble chaining loosely use a crochet hook 2 sizes larger than the one you use to make the double crochets.
  • Whether you decide to do a foundation chain or foundation double crochet, use a stitch marker to mark every 20 stitches.  This will make it easier to keep track of the number of stitches.
  • Print out the filet chart and mark through the stitches you have just completed with a pencil.  This will help you keep track of where you are.  If you have to go back and redo something, just erase the parts you need to redo.
  • Crochet the body of the chart first. Fasten it off and weave in ends, then attach your yarn in the places indicated on the top of the chart to make the loops.  Crochet each loop separately.  You may need to make your loops shorter or longer depending on the size of the curtain rod you use.  When you fasten off leave a long tail, so you can sew the loop together.

Instructions for Following the Chart

The size of the curtain depends on the size hook and yarn you use and your gauge.  

For the curtain in the picture I used a 
  • No 2 (C) 2.75 mm hook 
  • Pattons Grace Mercerized Cotton Light Weight (3) yarn, 5 skeins

Finished Size is 31 inches wide x 20 inches high  
Gauge is 6 sts per inch 2 rows per inch

For the demonstration I'm using an 
  • H hook No 8 5.00 mm
  • Worsted weight cotton yarn.  (since most cotton yarn comes in small skeins, it would probably take about 5 to 6 skeins.

Finished size with this yarn and hook would be about 52 inches wide x 31 1/2 high 
Gauge is 7 sts = 2 inches 3 rows = 2 inches

Start out on Row 1 (numbers on the sides of the chart).  There are 2 stitches per square.  The | symbol stands for 1 dc, the . stands for one ch.  

Row 1: You can either ch 157 (154 chs with the last 3 chs counting as the first dc) or I recommend doing 154 fdcs (foundation double crochet).  The fdcs are stretchier than the ch sts so you don't end up with one end of the curtain being tighter than the other.  Here is how to do the fdc stitch.  I you do better watching a video, here's a good one by Crochet Geek.


Ch 3

 YO hook then get ready to insert hook in bottom back bump of chain

 Insert hook in bottom bump of chain

YO Hook

Pull up a loop, 3 loops on hook

YO hook

Pull through 1 loop, 3 loops on hook

YO hook

Now continue with doing a DC in the regular way.  Pull through 2 loops, 2 loops left on hook

YO pull through last 2 loops

1st fdc made, DO NOT use the first ch 3 as a dc

 To make second fdc, YO hook


Insert in bottom loop


YO Hook


Pull through 1 loop, 3 loops on hook

YO hook

Pull through 2 loops on hook, 2 loops on hook

 YO hook

Pull through 2 loops on hook, 2nd fdc made


If you decided to ch only, insert hook in 4th ch from hook and make 154 dcs.

Row 2:  Ch 3 (counts as 1st dc), dc in top 2nd dc and in each to the end of the row (154 dcs)


I'm going to write out the next row to give you an idea of how to read the chart.  

Row 3:  Ch 3 (counts a 1st dc, from now on ch 3 at the beginning of each row for the first dc).  Reading the chart from the right hand side to the left (follow the red numbers at the bottom) do 3 dcs, ch 10 (loosely), do next dc in the 11th dc after your first 4 dcs, or in the 15th dc on the 2nd row, dc in next dc.  


Ch 18, dc in 19th dc after the last 2 dcs or in the 35th dc on the 2nd row, dc 10 more times. 


Ch 13 (you will notice that the first square has one | and one ., these count as the 2 sts in this square, one dc and one ch), dc in the 14th dc after the last dc made on row 3 or the 57th st on the second row, dc in the next st.  


Ch 16, dc in the 17th dc after the last dc made on row 3 or in the 77th dc on row 2, dc in next dc. 


Ch 16 dc in the 17th dc after the last dc made on row 3 or in the 95th dc on row 2, dc in next dc. 


Ch 12, dc in the 13th dc after the last dc made on row 3 or in the 109th dc on row 2, dc in next 9 dcs. 


Ch 12, dc in the 13th dc after the last dc made on row 3 or in the 131st dc on row 2, dc in next dc.  


Ch 6, dc in the 7th dc after the last dc made on row 3 or in the 139th dc on row 2, dc in next dc. 


Ch 10, dc in the 11th dc after the last dc made on row 3 or in the 151st dc on row 2, dc in next 3 dcs. (41 dcs and 113 chs).  


For Row 4 you will be reading the chart from left to right, you will switch back to reading right to left on Row 5.  

Continue to crochet to Row 48.  When you finish this row fasten off and weave in the ends, then attach the yarn in the indicated stitches for the loops. Do each loop separately, fasten off and leave a long tail for sewing.  Then sew the end of the loop down to the bottom of the beginning row for the loop.


Run your curtain rod through the loops to hang it.


Happy Hooking!

YOU MAY ALSO LIKE:

Shell Pattern Pillowghan

Henna-Tattoo Wedding Glove

Snowflake Napkin Rings

Pineapple Wedding Veil


Monday, March 17, 2014

Deb S's Harley Afghan


Deb S has been busy!  She crocheted this entire afghan.  My hat is off to you, this is not an easy pattern!

If you would like to make the Harley Afghan you can find it here.

YOU MAY ALSO LIKE:

Viking Helmet

Don't Tread on Me Afghan Chart

Army Afghan Chart

National Guard Chart


Tuesday, February 25, 2014

Mile-A-Minute Baby Moccasins


I designed these moccasins to go with the Mile-a-Minute Baby Cocoon and Hat.


Materials


  • F hook
  • DK weight yarn, in three contrasting colors A, B and C
  • Tapestry needle
Gauge

Shell Height = 3/4", Shell Width = 1 1/4" 5 sts = 1"

Abbreviations

ch(s)--chain(s)               dc(s)--double crochet                sl st--slip stitch             st(s)--stitch(es)                 tr(s)--triple or treble crochet(s)           sp--space         hdc(s)--half double crochet(s)   sc(s)--single crochet
BL--Back Loop             BLO--back loop only

Sole

With Yarn A
Row 1: Ch 6, sl st in beginning ch to form a loop, ch 3 (counts as 1st dc), 2 dcs in loop, ch 3, 3 dcs in loop, ch 3, turn.

Row 2: 3 dcs in ch-3 sp betw dcs, ch 3, 3 dcs in same ch-3 sp, dc in top of outside dc of previous row, ch 3, turn.

Rows 3 to 4: repeat row 2. (Size 6 weeks to 3 months)
Rows 3 to 5: repeat row 2. (Size 3 to 6 months)
Rows 3 to 6: repeat row 2. (Size 6 to 9 months)

Border
Size 6 weeks to 3 months
Rnd 1: Attach Yarn B in dc in 4th row as shown in picture below, ch 2, hdc in same st and next 2 dcs, *3 hdcs in next ch-3 sp* 3 times, hdc in side of last dc 3 times, 6 hdcs in ch-6 loop, hdc in side of dc on other side 3 times, *3 dcs in next ch-3 sp* 3 times, hdc in next  3 dcs, 6 hdcs in ch-3 sp, sl st in top of beginning ch 2,  fasten off.

Size 3 to 6 months

Rnd 1: Attach Yarn B in dc in 4th row as shown in picture below, ch 2, hdc in same st and next 2 dcs, *3 hdcs in next ch-3 sp* 4 times, hdc in side of last dc 3 times, 6 hdcs in ch-6 loop, hdc in side of dc on other side 3 times, *3 dcs in next ch-3 sp* 4 times, hdc in next  3 dcs, 6 hdcs in ch-3 sp, sl st in top of beginning ch 2,  fasten off.

Size 6 to 9 months
Rnd 1: Attach Yarn B in dc in 4th row as shown in picture below, ch 2, hdc in same st and next 2 dcs, *3 hdcs in next ch-3 sp* 5 times, hdc in side of last dc 3 times, 6 hdcs in ch-6 loop, hdc in side of dc on other side 3 times, *3 dcs in next ch-3 sp* 5 times, hdc in next  3 dcs, 6 hdcs in ch-3 sp, sl st in top of beginning ch 2,  fasten off.


Attach Yarn B

All Sizes

Rnd 2: Attach Yarn C in top of ch 2 , ch 1, sc in same st and in each dc all the way around, sl st in beginning sc, fasten off.

Weave in ends.


Top of Moccasin


With Yarn A
Row 1: ch 6, sl st in beginning ch to form a loop, ch 3 (counts as 1st dc), 2 dcs in loop, ch 3, 3 dcs in loop, ch 3, turn.

Row 2: 3 dcs in ch-3 sp betw dcs, ch 3, 3 dcs in same ch-3 sp, dc in top of outside dc of previous row, ch 3, turn.

Row 3: repeat row 2. (Size 6 weeks to 3 months)
Rows 3 to 4: repeat row 2. (Size 3 to 6 months)
Rows 3 to 5: repeat row 2. (Size 6 to 9 months)


Border
Size 6 weeks to 3 months
Rnd 1: Attach Yarn B in dc in 4th row as shown in picture below, ch 2, hdc in same st and next 2 dcs, *3 hdcs in next ch-3 sp* 2 times, hdc in side of last dc 3 times, 6 hdcs in ch-6 loop, hdc in side of dc on other side 3 times, *3 dcs in next ch-3 sp* 2 times, hdc in next  3 dcs, 6 hdcs in ch-3 sp, sl st in top of beginning ch 2,  fasten off. 

Size 3 to 6 months

Rnd 1: Attach Yarn B in dc in 4th row as shown in picture below, ch 2, hdc in same st and next 2 dcs, *3 hdcs in next ch-3 sp* 3 times, hdc in side of last dc 3 times, 6 hdcs in ch-6 loop, hdc in side of dc on other side 3 times, *3 dcs in next ch-3 sp* 3 times, hdc in next  3 dcs, 6 hdcs in ch-3 sp, sl st in top of beginning ch 2,  fasten off. 

Size 6 to 9 months
Rnd 1: Attach Yarn B in dc in 4th row as shown in picture below, ch 2, hdc in same st and next 2 dcs, *3 hdcs in next ch-3 sp* 4 times, hdc in side of last dc 3 times, 6 hdcs in ch-6 loop, hdc in side of dc on other side 3 times, *3 dcs in next ch-3 sp* 4 times, hdc in next  3 dcs, 6 hdcs in ch-3 sp, sl st in top of beginning ch 2,  fasten off.  

All Sizes 
Rnd 2: Attach Yarn C in top of ch 2 , ch 1, sc in same st and in each dc all the way around, sl st in beginning sc, fasten off.


Sides of Bootie

Attach Yarn C in BL of any sc on side of sole, ch 4, tr in BLO of each sc around sole, sl st in top of beginning ch 4,  fasten off.


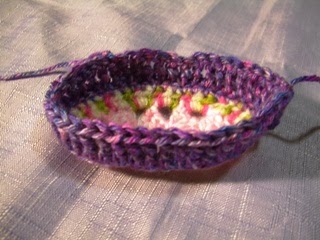
Sole with the sides attached.

Whip stitch the top of the moccasin to the sides, sewing towards the front of the shoe, then around on the other side, leaving a space to put the foot into.


Happy Hooking!


YOU MAY ALSO LIKE:

Mile-A-Minute Baby Cocoon

Mile-A-Minute Baby Hat

Little Girl Purses

Little Girl Hats


Monday, February 24, 2014

Yarn Bomb at Passage du Grand Cerf


My good friend, Stephanie Bower, won the Gabriel Prize so she got to spend last summer sketching in Paris.  While she was there she came upon this beautiful yarn bomb in one of the many passages running throughout the city. The red flowers were one side and the blue on the other.  I think the blue side looks like an under water scene.  If you would like to check out the drawings and paintings Stephanie did last summer, as well as all of her new ones, check out her blog here.  


YOU MAY ALSO LIKE:

People of the Water Granny Square

Fiesta Earrings

Henna Tattoo Inspired Glove

Seahorse Applique

Friday, February 21, 2014

Mile-a-Minute Baby Hat


Materials


  • F hook
  • DK weight yarn, in three contrasting colors A, B and C
  • Tapestry needle


Abbreviations

ch(s)--chain(s)       beg--beginning        dc(s)--double crochet sl st--slip stitch       st(s)--stitch(es)        
tr(s)--triple or treble crochet(s)            betw--between

Gauge
1 shell = 1 1/4 ", each panel is 3" wide and 6 1/2" long
5 sts and 2 rows per inch

Panels
Make 4 for a Premie and 5 for a full term baby.

With Yarn A
Row 1: ch 6, sl st in beg ch to form a loop, ch 3 (counts as 1st dc), 2 dcs in loop, ch 3, 3 dcs in loop, ch 3, turn.

Row 2: 3 dcs in ch-3 sp betw dcs, ch 3, 3 dcs in same ch-3 sp, dc in top of outside dc of previous row, ch 3, turn.

Rows 3 to 10: repeat row 2.

Border
Rnd 1: Attach Yarn B in dc in 10th row as shown in picture below, ch 4, dc in next dc, dc in next dc, 3 dcs in ch-3 sp, *3 dcs in next ch-3 sp* 8 times, dc in side of last dc 3 times, 10 dcs in ch-6 loop, dc in side of dc on other side 3 times, *3 dcs in next ch-3 sp* 9 times, dc in next  2 dcs, tr in last dc. fasten off.


Attach Yarn B here


Rnd 2: Attach Yarn C in top of ch 4, ch 3, dc next dc and in each dc down side, to the round end, 2 dcs in 3rd dc in round, dc in next 3 dcs, 2 dcs in 7th dc then dc in each dc down to the other side and in last tr at the end, fasten off.

Weave in ends.

Whip stitch the panels together, starting at the straight end, down about 3 inches, leaving the rounded ends open.


 Join all the panels together. Then join the two outside panels together to form a tube.


Weave in loose ends.


Top
Rnds 1 through 5 for Premie, 1 through 6 for full term baby.

Make a magic circle
Rnd 1:  Ch 3, do 11 dcs in circle, sl st in top of turning ch. Pull magic circle tightly together. (12 dcs)
Rnd 2: Ch 3, dc in same st, 2 dcs per dc around, sl st in top of turning ch. (24 scs)
Rnd 3: Ch 3, dc in same st, dc in next dc, *2 dcs in next dc, dc in next dc* 11 times, sl st in top of turning ch. (36 scs)
Rnd 4: Ch 3, dc in same st, dc in next 2 dc, *2 dcs in next dc, dc in next 2 dc* 11 times, sl st in top of turning ch. (48 scs)
Rnd 5: Ch 3, dc in same st, dc in next 5 dcs, *2 dcs in next dc, dc in next 5 dc* 7 times, sl st in top of turning ch. (56 scs)
Rnd 6: Ch 3, dc in same st, dc in next 6 dcs, *2 dcs in next dc, dc in next 6 dc* 7 times, sl st in top of turning ch. (64 scs)


Sew top onto joined panels.


Sew rounded part of panels to edge of top.


Happy Hooking!


YOU MAY ALSO LIKE:

Mile-a-Minute Baby Cocoon

Beginner Baby Rattle

Star Trek Baby Bib

Sleeping Angel Afghan Chart


Monday, February 17, 2014

Finished Peacock Afghan


Tricia has finished her Peacock Afghan.  I think it looks BEAUTIFUL.  If you would like to make the Peacock Afghan you can find it here.  Lea made the border by using the peacock feathers onto Lisa Oberdorf's Peacock Doily.


YOU MAY ALSO LIKE:

Owlet in a Tree Hollow Afghan Chart


Amigurumi Yorkie

Mile-a-minute Baby Cocoon

Laid Back Cat