Tuesday, March 26, 2013

Marine Corps Afghan Chart


THIS PATTERN IS NOW DOWNLOADABLE ON MY NEW FACEBOOK GROUP PAGE.  YOU CAN FIND IT HERE.  JUST GO TO THE FILES TAB TO DOWNLOAD.

Here is my latest afghan chart. It was requested by Sandra for her Marine son and  Corinne who crochets afghans for the VFW, Fisher House, and hospitals.

I altered the insignia somewhat to make it easier to crochet, but I tried to stay true to the original design.

Each square on the pattern counts as a single crochet.  It has 170 stitches across and 211 rows. The gauge of the pattern totally depends on the size yarn and hook you use.  I measured my gauge for worsted weight yarn and an I hook at 4 sts and 4 rows = 1".  With this gauge the afghan would measure 42 1/2" x 52 3/4" .  If you want to make it wider or longer, I'd add red stitches on either side of the pattern for width or more rows to the top and bottom of the pattern to make it longer.  I don't knit, but I think you could use this for a knitted afghan as well. I recommend using Red Heart Super Saver yarn or Red Heart Super Saver Economy yarn.

If you are really talented (and somewhat ambidextrous) you can switch the hook to your left hand when you get to the end of the row and then crochet back the way you came like Carol Ventura does.

This is another video tutorial by Red Heart Yarn.

If you are new to crochet charts check out my Globe Pillow Crochet Along, it has a tutorial on how to read a chart.  If you would rather cross stitch the details of the chart, I would crochet the major areas and then you can have a look at my Day of the Dead Banner (also below) pattern for a tutorial on how to cross stitch on single crochet for the finer details. 

For other tips on following a crochet chart check out my Harley Davidson Afghan post.

I realize there's no way you could crochet this afghan from this tiny picture, so if you want the chart email me at crochetparfaitpg@yahoo.com.  Let me know what format you want it in.  (Excel--editable .xlsx, Adobe .pdf or picture .png,  I recommend the .xlsx or .png files because the pdf splits it up into several pages.)

If anyone wants to make this afghan or anything "Marine" for sale please be sure to check this website for licensing of the image.  Thanks.

Happy Hooking!

YOU MAY ALSO LIKE:
Navy Afghan Chart
                                 
           John Deere Afghan
Chicago Black Hawk Afghan

Diamond Spike Glasses Case

Tuesday, March 19, 2013

Harley Davidson Afghans in Process

Single Crochet

I'm finding the best way to keep the integrity of the design is to crochet each row in the same direction.  That means I have to cut the yarn at the end of the row (I'm crocheting right to left since I'm right handed) and then join it again on the next row at the beginning of the row.  I start on the right with the black yarn then add each color as it comes up in the design and then drop those colors as they end in the design ending with the black yarn at the end of the row and tying off.    

If you are really talented (and somewhat ambidextrous) you can switch the hook to your left hand when you get to the end of the row and then crochet back the way you came like Carol Ventura does.

This is another video tutorial by Red Heart Yarn.


Double Crochet

Kelly says "I'm not a fan of this method and here's the reasons,  uses a lot of yarn, a lot of bobbins, you can see unused thread from right side and the work isn't tight. Since I started one in the afghan stitch using the extra long J hook , I honestly don't want to go back to the double crochet method."


Afghan Stitch
"the afghan stitch is tight, uniform, no mess with bobbins, thicker, and I'm lovin' this because I can rock in my chair instead of leaning over a table..you can hide the extra yarn in the back as well."


If you would like to ask Kelly about making the afghan in afghan stitch you can reach her here.


Here is a tutorial video by Crochet Geek on how to do the afghan stitch. 


Here is a finished version of the Harley Afghan by Penny Jones.


YOU MAY ALSO LIKE:

Tuesday, March 12, 2013

John Deere Afghan

Deb recently asked me to make a John Deere afghan chart for her grandsons and Janet asked for a chart with a deer on it for her husband.  This chart kills 2 birds with one stone.


THIS PATTERN IS NOW DOWNLOADABLE ON MY NEW FACEBOOK GROUP PAGE.  YOU CAN FIND IT HERE.  JUST GO TO THE FILES TAB TO DOWNLOAD.

The Chart is 187 squares across and 167 squares long. With an I hook and worsted weight yarn I measured my gauge at 4 sts and 4 rows = 1 inch, so I estimate this afghan would be about 47" x 42". 
I don't knit, but I think you could use this for a knitted afghan as well.

I estimate that it will take 500 yd skeins of worsted weight yarn, 3 in green and 2 each in yellow and white.

If you are new to crochet charts check out my Globe Pillow Crochet Along.  It has a tutorial on how to read a chart and change yarn.  

For other tips on how to do a charted afghan check out my Harley Davidson Afghan post here.

I realize there's no way you could crochet this afghan from this tiny picture, so if you want the chart email me at crochetparfaitpg@yahoo.com.  Let me know what format you want it in.  (Excel--editable .xlsx, Adobe .pdf or picture .png,  I recommend the .xlsx or .png files because the pdf splits it up into several pages.)

Happy Hooking!

You May Also Like:

         
Scrap Heart Gloves
Harley Davidson Afghan
Peacock Scarf


Monday, March 11, 2013

Friday, March 1, 2013

Star Trek Baby Bib


I'm a Trekkie from way back, so when I got a request for a Star Trek Baby Bib, I dove right in.  The bib is based on Captain Kirk's uniform.  The ribbing on the neck is stretchy so it should fit most babies and toddlers.  Beam me up Scotty!


Materials:
  • Red Heart Shimmer, Black Yarn
  • Caron Simply Soft, Mango
  • Vanna's Glamour, Gold
  • F Hook
  • 3/4" button
Special Stitches:
BLO--Back Loop Only--attach the yarn only in the back loop of the stitch


Abbreviations:

ch(s)--chain(s)          sc(s)--single crochet(s)           BLO--Back Loop Only
dc(s)--double crochet(s)         sl st--slip stitch        hdc--half double crochet
dc2tog--double crochet 2 together          st(s)--stitch(es)
dc3tog--double crochet 3 together

Pattern:

Ribbed Yoke:

Row 1: With Black Yarn, ch 5, sc in second ch from hook and in each ch across, turn. (4 scs)
Row 2: Ch 1, sc in BLO in each sc, turn. (4 scs)

Repeat Row 2 until the yoke is 11" long, ch 4, sl st in 4th sc to make a button hole. Fasten off and weave in ends.

Body:

Row 1:  Attach Mango Yarn to side of first row on yoke next to the button hole.  Ch 3 (counts as first dc in the row and all subsequent rows), dc in next row and in each row to the end, turn. (48 dcs)


Row 2:  Ch 3, dc in 1st dc, 2 dcs in next 2 dcs, 1 dc in next 3 dcs, 2 dcs in next 4 dcs, 1 dc in next 28 dcs, 2 dcs in next 4 dcs, 1 dc in next 3 dcs, 2 dcs in next 2 dcs and in top of turning ch, turn. (60 dcs)

Row 3: Ch 3, dc in next 7 dcs, 2 dcs in next 5 dcs, dc in next 3 dcs, 2 dcs in next 4 dcs, dc in next 5 dcs, 2 dcs in next 9 dcs, dc in next 7 dcs, 2 dcs in next 5 dcs, dc in next 3 dcs, 2 dcs in next 4 dcs, dc in next 8 dcs. Fasten off, weave in ends. Turn.  (88 dcs)

Row 4: Attach Mango Yarn in 26th dc from fasten off.

Ch 1, sl st in next dc, sc in next dc, hdc in next dc, 2 dcs in next 2 dcs, dc in next 7 dcs, 2 dcs in next dc, dc in next 3 dcs, 2 dcs in next 2 dcs, dc in next 3 dcs, 2 dcs in next dc, dc in next 7 dcs, 2 dcs in next 3 dcs, dc in next dc, hdc in next dc, sc in next dc, sl st in next dc, fasten off, Turn. (45 sts)

Row 5:  Attach Mango Yarn in 1st dc from fasten offCh 3, dc in next 7 dcs, 2 dcs in next dc, dc in next 7 dcs, 2 dcs in next dc, dc in next 2 dcs, 2 dcs in next dc, dc in next 2 dcs, 2 dcs in next dc, dc in next 7 dcs, 2 dcs in next dc, dc in next 8 dcs, turn.  (44 dcs)

Row 6: Ch 3, dc in next dc, dc2tog 2 times, dc in next 3 dcs, 2 dcs in next dc, dc in next 7 dcs, 2 dcs in next dc, dc in next 2 dcs, 2 dcs in next 4 dcs, dc in next 2 dcs, 2 dcs in next dc, dc in next 7 dcs, 2 dcs in next dc, dc in next 3 dcs, dc2tog 2 times, dc in next 2 dcs, turn. (48 dcs)

Row 7: Ch 3, dc in next dc, dc2tog 2 times, dc in next 9 dcs, 2 dcs in next dc, dc in next 7 dcs, 2 dcs in next 2 dcs, dc in next 7 dcs, 2 dcs in next dc, dc in next 9 dcs, dc2tog 2 times, dc in next 2 dcs, turn. (48 dcs)

Row 8:  Ch 3, dc in next dc, dc2tog 2 times, dc in next 11 dcs, 2 dcs in next dc, dc in next 5 dcs, 2 dcs in next 2 dcs, dc in next 5 dcs, 2 dcs in next dc, dc in next 11 dcs, dc2tog 2 times, dc in last 2 dcs, turn. (48 dcs)

Row 9: Ch 3, dc in next dc, dc2tog 2 times, dc in next 17 dcs, 2 dcs in next 2 dcs, dc in next 17 dcs, dc2tog 2 times, dc in last 2 dcs, turn. (46 dcs)

 Row 10: Ch 3, dc in next dc, dc2tog 2 times, dc in next 16 dcs, 2 dcs in next 2 dcs, dc in next 16 dcs, dc2tog 2 times, dc in last 2 dcs, turn. (44 dcs)

Row 11: Ch 3, dc in next dc, dc2tog 2 times, dc in next 15 dcs, 2 dcs in next 2 dcs, dc in next 15 dcs, dc2tog 2 times, dc in last 2 dcs, turn. (42 dcs)

Row 12: Ch 3, dc in next dc, dc2tog, dc in next 16 dcs, 2 dcs in next 2 dcs, dc in next 16 dcs, dc2tog, dc in last 2 dcs, turn. (42 dcs)

Row 13:  Ch 3, dc in next dc, dc2tog, dc in next 16 dcs, 2 dcs in next dc, dc in next 16 dcs, dc2tog, dc in last 2 dcs, turn. (40 dcs)

Row 14:  Ch 3, dc in next dc and in each dc across, fasten off, weave in ends. (40 dcs)


Star Trek Insignia:

With Gold Yarn, ch 10.
Row 1:  Sl st in second ch from hook, 3 scs in next ch, 2 scs in next ch, sc once each in next 4 chs, sl st in last ch, turn.

Row 2: Ch 1, sl st in next sc, hdc in next 4 sts, 2 hdcs in next 2 sts, 3 hdcs in next st,  sc in next st, sl st in next st, fasten off.  Turn.

Row 3:  Attach Gold Yarn in 3rd st from fasten off.  Ch 1, sc in next st, hdc in next st, 3 hdcs in next st, 2 hdcs in next st, sc in next 3 sts, sl st in next st, fasten off.  Turn

Row 4: Attach yarn in 3rd st from fasten off.  Ch 1, sl st in next st, 3 hdcs in next st, hdc in next st, 2 hdcs in next st, sc in next st, sl st in next st, fasten off.  Turn.


Row 5: Attach yarn in 3rd st from fasten off. Ch 3, dc3tog, fasten off.


Weave in ends, pulling yarn through the holes to fill them in and make it look more like the Star Trek Insignia.


Attach Black Yarn in shorter pointed end. Sl st in next st and in each st around (2 sl sts in side of dc).


Embroider star with Black Yarn.  I just kind of eyeballed it, but if you want a tutorial on how to make a really professional looking star try this one from Handcrafted Greetings.


Whip stitch Insignia to bib.


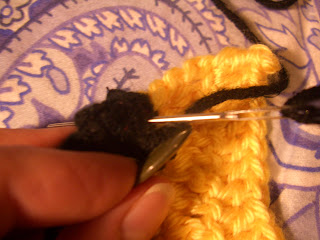
Sew on button.  If you button doesn't have a shank you can wrap the yarn around the stitches under the button to make it stand out from the yoke.


All ready for your little Trekkie!


150X120 Baby Crochet Patterns Stitch & Share + Giveaway!
link party

YOU MAY ALSO LIKE:


                          Hello Kitty Locker Mirror
Viking Helmet
Amigurumi Yorkie