
I am constantly switching from my reading glasses to my sun glasses when I'm out shopping. I have a cheap case that has a snap hook on it so I could attach it to the outside of my purse, but it's starting to look pretty shabby, so I decided to make a new one.
I saw this spike stitch pillow on Crochet Me and decided to do a variation on the pattern. The spike stitch is a lot easier than it looks, so don't be afraid to try this easy pattern. The pattern also includes a tutorial on how to do a simple lining.
Materials:
This is a stash buster, so you can use any worsted weight yarn you have on hand. I used 4 different colors (A, B, C and D), but you can use as many as you like. Try doing a search for color combinations to help you decide.
- H Hook
- 1 Snap Hook
- Small piece of fabric for lining (8"x13"), preferably with a selvage along the bottom of the 13" edge.
- 1-1" button
- Thread
- Regular and Darning needles
- Stick pins
- Iron
- Fabric Protector
Special Stitches
Spike Stitch--Insert hook in the indicated row, pull up a loop all the way to the top of the piece, finish the stitch as you would a regular single crochet.


Gauge
8 scs = 8 inches ( " ), 8 rows = 8 inches ( " )
ch--chain sc(s)--single crochet(s)
Case Back
Row 1: With Color A Ch 17. Sc in second ch from hook and in each ch across. (16 scs)
Rows 2-5: Ch 1, turn, sc in first st and in each st across. (16 scs). Fasten off, leave a tail for weaving in. Turn.
Row 6: Attach Color B. Ch 1, sc in same st. *Spike in 1st row, Spike in 2nd row, Spike in 3rd row, Spike in 4th row, Spike in 5th row* repeat 3 times.


Row 7-10: Ch 1, turn, sc in first st and in each st across (16 scs). Fasten off, leave a tail for weaving in. Turn.
From now on when I refer to the 1st, 2nd, 3rd, 4th, and 5th rows, I mean the contrasting bar of rows below the row of spike stitches.
Row 11: Attach Color C. Ch 1, sc in same st, Spike in 4th row, Spike in 3rd row, Spike in 2nd row, Spike in 1st row. *sc, Spike in 4th row, Spike in 3rd row, Spike in 2nd row, Spike in 1st row.* repeat 2
times, sc in last st.

Row 16: Attach Color D. Ch 1, sc in same st. *Spike in 1st row, Spike in 2nd row, Spike in 3rd row, Spike in 4th row, sc* repeat 3 times.
 |
| Now you can see the diamonds forming |
times, sc in last st.
Row 22-25: Ch 1, turn, sc in first st and in each st across (16 scs). Fasten off, leave a tail for weaving in. Turn.
Row 26: Attach Color B. Ch 1, sc in same st. *Spike in 1st row, Spike in 2nd row, Spike in 3rd row, Spike in 4th row, sc* repeat 3 times.
Row 27-30: Ch 1, turn, sc in first st and in each st across (16 scs). Fasten off, leave a tail for weaving in. Turn.
Row 31: Attach Color C. Ch 1, sc in same st, Spike in 4th row, Spike in 3rd row, Spike in 2nd row, Spike in 1st row. *sc, Spike in 4th row, Spike in 3rd row, Spike in 2nd row, Spike in 1st row.* repeat 2
times, sc in last st.
Row 32-35: Ch 1, turn, sc in first st and in each st across (16 scs). Fasten off, leave a tail for weaving in. Turn.
Row 36: Attach Color D. Ch 1, sc in same st. *Spike in 1st row, Spike in 2nd row, Spike in 3rd row, Spike in 4th row, sc* repeat 3 times.
Rows 37: Ch 1, turn, sc in first st and in each st across (16 scs).
Row 38: Ch 1, turn, sc in first sc and in next 5 scs, ch 6, sk 4 scs, sc in 5th sc and in each sc to end.

Row 39: Ch 1, turn, sc in first 6 scs, pull the chain forward, then drop down to where sts were skipped and do an sc in each, then go back up to current row and sc to end. If you don't want to add a snap hook to your case, you can skip doing the chain and just repeat Row 38.

Row 40: Ch 1, turn, sc in first sc and in each sc across.
Row 41: Attach Color A. Ch 1, sc in same st, Spike in 4th row, Spike in 3rd row, Spike in 2nd row, Spike in 1st row. Do the following Spike sts underneath the ch. *sc, Spike in 4th row, Spike in 3rd row, Spike in 2nd row, Spike in 1st row.* repeat 2
times, sc in last st.


Row 42: Ch 1, turn, sc in first sc and in each sc across.
Row 43: Ch 1, turn, sc in first sc and in the next 5 scs, ch 3, sk 3 scs, sc in 4th sc and in each sc across. (the skipped sts along with the ch will form the button hole.)

Row 44: Ch 1, turn, sc in first sc and in next 5 scs, 3 scs in ch, then sc in each sc to the end of the row.

Row 45: Ch 1, turn, sc in first sc and in each sc across. Fasten off, leaving a tail for weaving in.

See how the top green rows with the button hole are not even with the rest of the rows? You can fix this by pulling on each side of the green rows to stretch them to match the other rows, then iron with a steam iron. The iron kills the stretchiness of the yarn and makes it hold it's shape.

Weave in all loose yarn, making sure to hide it in between the stitches and weaving it in several different directions to secure yarn.
Case Front
Repeat Rows 1-35 of Case Back
Weave in all loose yarn, making sure to hide it in between the stitches and weaving it in several different directions to secure yarn.
Lining

Fold in half

If you need to, draw in a 1/4" line on the raw edge on the side.


Sew a 1/4" seam using the back stitch. Tie a knot in the end of the thread. Make a stitch leaving a small gap.

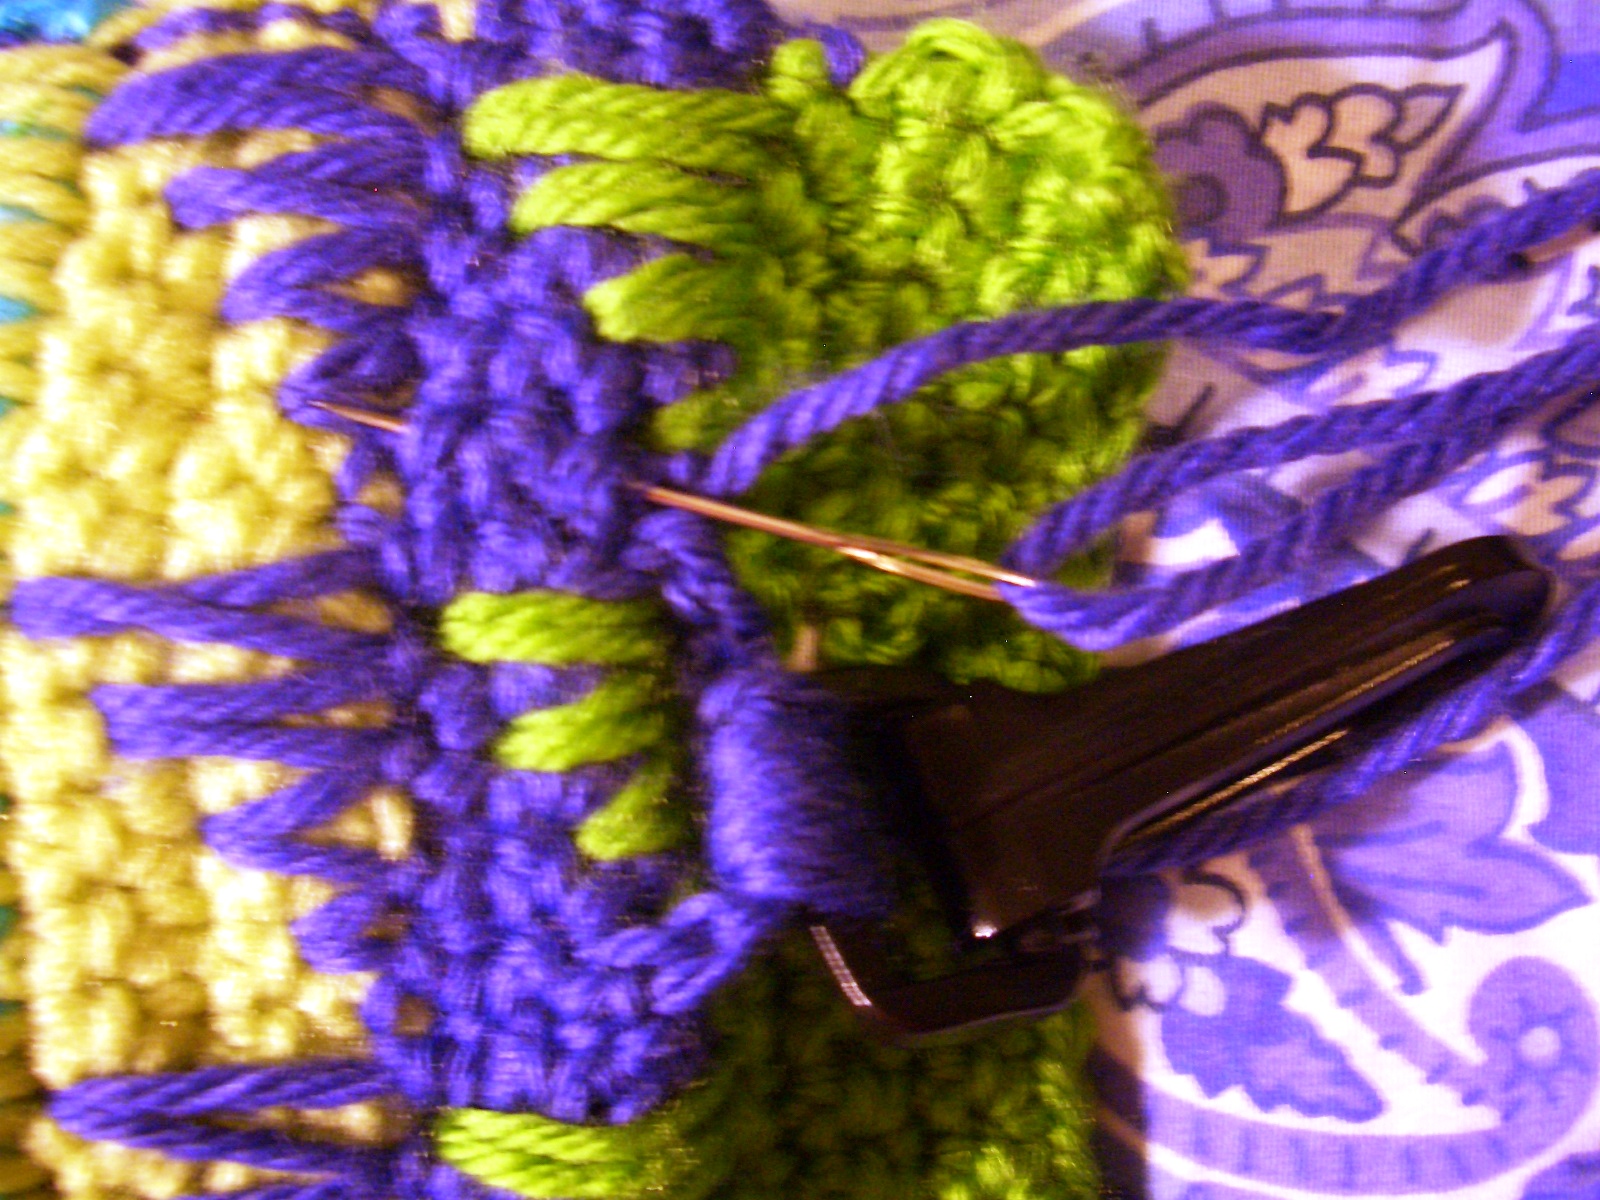
Insert the needle back at the first stitch, and come out a small distance from where the thread last came through the fabric.


This is how the stitch looks on the back. Stitch back over your previous stitches for a few stitches to secure seam.


Insert your knotted, threaded needle into the fabric and pull through.

Start near the selvage edge. Insert the needle back into the same spot, making sure the needle goes to the inside of the loose thread.

Pull the thread to the top of the seam, then insert the needle into the seam stitching a little farther down and make sure the needle goes inside the thread. Continue down the seam to about an 1" from the end.


Pull the fabric so the seam ends up in the middle.

Press the seam to one side.


Fold the edges of the lining inward to form a pleat, making sure that it is about 1/4' inside the line of the front of the case.

Do this on both sides

Iron the pleats flat.


Sew the bottom of the lining together, along the selvage edge if you have one. If you don't have a selvage, sew a 1/4" seam like the side seam and use the blanket stitch to secure. Double the thread this time to make the seam stronger.


Sew back over the stitches all the stitches to secure, since this seam will probably get the most stress.


Line up the lining so its just inside the bottom and sides the front of the case.


Fold the top of the lining down so that it is also just inside the front of the case, pushing the sides in to keep the pleats.


Press the fold down.


Pin the lining to the top only of the wrong side of the front of the case. The right side will match the right side of the back of the case (the right side of the back of the case has the chained loop on it.)


Place the back of the case to match up with the sides and bottom of the front.

Slip stitch the two sides of the case together, beginning at the side. I used Color D to join the case.

To secure the yarn pull through the tail of the yarn along with the rest of the loop on the first stitch only.


Slip stitch the sides and bottom of the front and back of the case together, leaving the flap end open.

Unpin the lining from the front of the case and pin it to both the front and back from the inside of the lining. Sew the lining to the back of the case and to the front of the case, hiding your stitches. Don't sew down the sides of the lining, you want this to stay loose so it can accommodate a large pair of glasses.


To attach the snap hook, thread the darning needle with a long piece of yarn (about 20"). (I used Color D). Place the bottom of the snap hook on top of the chained loop on the top of the flap and using the needle thread the yarn through the chain and the bottom of the hook several times. Make sure to leave a long tail on the end for weaving in.


Weave the yarn through the loops three times.


Then weave the yarn through one side of the chain.

Then weave the yarn into the crocheted stitches on the back of the case.
Do the same with the tail of the yarn, going through the other side of the chain this time.


To place the button, fold the flap over the front of the case and push a stick pin through the hole.

Gently lift up the flap leaving the pin in place.


Sew the button over where the pin is place.


To protect your case from dirt, you can apply some fabric protector. Just make sure your yarn is colorfast first. (Most acrylic yarn is colorfast.)

I attached my snap hook to the metal loop of the strap of my purse. Now my glasses are easily accessible.
The case is large enough to hold my sunglasses and an extra pair of reading glasses.

YOU MAY ALSO LIKE:
 |
| Hiking Sticks |
 |
| John Deere Afghan |
 |
| Falling Leaves Cowl |
very cute :)
ReplyDeleteThanks!
DeleteThis comment has been removed by the author.
ReplyDeleteWow, Pam, what a great blog!!! Been 'grabbing' a lot of patterns, love everything here , love all your patterns so I´ll be back really often!
ReplyDeleteThank you so much for sharing so many FREE patterns, Love it, ' cause´if they were charged with something, I couldn´t gert any, as my pension doesn`y allow me to pay for them!!! 'Dammed crisis´!!! . Love and a big bear hug from Spain!
ReplyDelete
You're welcome. I like free patterns too.
Delete