Thursday, May 30, 2013

Lace Spa Basket


This spa basket from La Maison Bleue has been circulating on Pinterest for awhile now, but I've never seen a pattern for it.  I think it's really lovely and it's actually not that hard to make.  Here is my rendition.

La Maison Bleue


Materials

  • 2 to 3 skeins Lily's Sugar N' Cream cotton worsted weight yarn, white
  • G hook
  • Tapestry Needle

Finished Size

Size 6" x 12" x 3"

Gauge 
13 sts = 4", 5 rows = 2 "


Abbreviations
ch(s)--chain(s)             hdc(s)--half double crochet(s)            FLO--front loop only


Bottom of Basket


Ch 41
Row 1: Hdc in back bump of  3rd ch from hook and each ch to end. (39 hdcs)
Row 2: ch 2, hdc in same st, hdc in each st to end (39 hdcs)
Rows 3 to 16:  Repeat  Row 2.

Sides of Basket


Row 17: Ch 2, hdc in FLO of same st and in FLO of each hdc across (39 FLO hdcs) 
Crocheting in the FLO allows the ends to stand up.


Row 18 to 24: repeat Row 2. Fasten off.

Row 25: Attach yarn in front loop of the foundation chain.  Ch 2, hdc in FLO of next st, hdc in FLO of each st across. (39 FLO hdcs)


Row 26 to 32:  Repeat Row 2. Fasten off.


Row 33: Attach yarn in the FL of the post on the right side of the basket next to the 1st FLO hdc (22 hdcs)


Row 34 to 40:  Repeat Row 2. Fasten off.


Row 41:  Attach yarn in the FLO of the post on the right side of the basket next to the FLO hdc opposite of the first short side,  (22 hdcs)


Rows 42 to 48: Repeat row 2. Fasten off.


Sew up the sides of the basket.  Weave in ends.


Insert
Make 2.

Row 1: Ch 13, hdc in back bum of 3rd ch from hook and in each ch across. (11 hdcs)
Row 2: Ch 2, hdc in same st and in each st across. (11 hdcs)
Rows 3 to 11: Repeat row 2.

Row 12: Ch 2, hdc in FLO of same st and FLO of each st to the end (11 FLO hdcs)

Row 13 to 18: Repeat row 2. Fasten off.

Row 19:  Attach yarn in BL of Row 12. Ch 2, hdc in BLO of same st, hdc in BLO of each st to end (11 BLO hdcs)

Row 20 to 25: Repeat Row 2, fasten off.

This is what one insert look like


Middle

Row 1: Ch 13, hdc in back bum of 3rd ch from hook and in each ch across. (11 hdcs)
Row 2: Ch 2, hdc in same st and in each st across. (11 hdcs)
Rows 3 to 6: Repeat row 2.

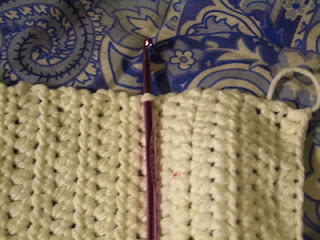
Sew middle onto one insert in the middle between the FLO and BLO rows.


Sew the second insert on the the middle piece, in between the FLO and BLO rows.


Use contrasting yarn to mark where you are going to sew down the insert.


Sew the insert onto the sides of the basket, then remove the contrasting thread and sew the insert down to the bottom of the basket.


Basket Edging

Rnd 1: Attach yarn in one corner of the basket.  *Ch 4, sk 2 sts, sl st in next st* repeat until you have gone all the way around the edge of the basket.


Rnd 2:  Ch 1, sl st into 1st ch-4 sp, *ch 3, sl st in next ch-4 sp* all the way around, ch 3 and sl st in beginning ch-4 sp.

Rnd 3:  Ch 3, dc 5 times in 1st ch-3 sp, sl st in next ch-3 sp, *dc 6 times in next ch-3 sp, sl st in next ch-3 sp* 20 times, sl st in top of beginning ch 3.  Fasten off, weave in ends.  


If you would like to stiffen the basket, here are several ways you can do it.

Happy Hooking!

You May Also Like:

Shell Pattern Pillowghan

Breast Cancer Awareness Pillow

Turbanesque Headband

Wednesday, May 29, 2013

Summer Patterns

Have you tried out these summery patterns yet?


1.  Chain Stitch Bangle Bracelet--an easy pattern, beginners this one's for you!

2.  Fiesta Earrings--a quick pattern for a great summer accessory.

3.  Seahorse Applique--reminds me of the beach!

4.  Henna Tattoo Inspired Wedding Glove--a special accessory for that summer wedding.

5.  Beginner Washcloth--another great beginner pattern.

6.  Shell Pattern Pillowghan--a pillow in summer, an afghan in winter.

7.  Hiking Sticks--for that summer hike.

8.  Pineapple Wedding Veil--a special veil for a summer bride.

Tuesday, May 14, 2013

John's Present for Mother's Day


John just made this cutie for his mom for Mother's Day.  I think he did a great job!

If you would like to make a Yorkie for your mom you can get the pattern here.


You May Also Like:

Hello Kitty Corsage/Bracelet

Quick Ripple Cowl

Peacock Scarf


Tuesday, May 7, 2013

Vote for Me!

Stitch and Unwind is having a link up party for baby patterns.  There's all kinds of cute stuff, so go and check it out!
150X120 Baby Crochet Patterns Stitch & Share + Giveaway!
While you are there, VOTE for my STAR TREK BABY BIB and maybe I'll win some new hooks by the Crochet Dude.


You May Also Like:

Viking Helmet

Breast Cancer Awareness Pillow, Breastplate

Day of the Dead Banner


Monday, May 6, 2013

Hello Kitty Prom Corsage/Bracelet


Prom is coming up soon.  I designed this Corsage for that Hello Kitty girl who dares to be different.  It's a simple pattern that only takes a couple of hours or less to make.

Materials

  • Red Heart Shimmer yarn  in  Snow, Hot Pink and Black 
  • F hook
  • Tapestry needle
  • Black adhesive backed felt
  • Blingy button or ribbon of your choice
  • 2 1/2" wide gold wired ribbon
  • needle
  • yellow or gold thread

Special Stitches

DcHdctog--Crochet a double crochet and an half double crochet together--Yarn over (YO) hook, insert hook in next stitch (st), YO, pull up a loop, 3 loops on hook.  YO, pull through 2 loops, 2 loops on hook.  YO, insert hook in next st, YO, pull up a loop, 4 loops on hook.  YO, pull through all 4 loops on hook.  Dchdc2tog made.


YO

Insert hook in st, YO
Pull up a loop, 3 loops on hook

YO

Pull through 2 loops
2 loops on hook

YO

Insert hook in next st

Pull up a loop, 4 loops on the hook

YO
Pull through all loops on hook

dchdc2tog made

 Abbreviations

ch(s)--chain(s)         sc(s)--single crochet(s)        dchdc2tog--double crochet and half double crochet togther
hdc(s)--half double crochet(s)          dc(s)--double crochet(s)              tr(s)--treble or triple crochet(s)
st(s)--stitch(es)        sl st(s)--slip stitch(es)       beg--beginning


Hello Kitty Face

With Snow Yarn Ch 4, leaving a long tail for sewing later.
Rnd 1:  Sc in 2nd ch from hook, sc in next ch, sc 3 times in last ch, sc in back side of next ch, sc in last ch 3 times ( 9 scs)


Rnd 2: Sc in next 3 scs, sc 3 times in next sc, sc in next 4 scs, 3 scs next sc.  (13 scs)
Rnd 3: Sc in next 4 scs, 3 scs in next sc, sc in next 5 scs. 2 scs in next 2 scs. (16 scs)
Rnd 4: Sc in next 5 scs, 2 scs in next 2 scs, sc in next 6 scs, 2 scs in next 2 scs, sl st in next sc. (19 scs)

Ears

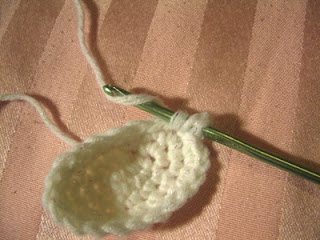
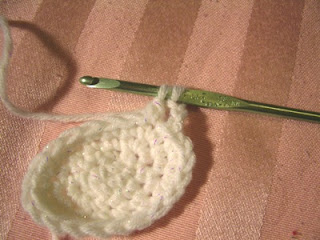
Right Ear:  Ch 3, dchdctog in next 2 scs (see special stitches),  clip end of yarn, long enough for sewing but don't fasten off.  Instead pull loop till it's small, then thread needle with the end of the clipped yarn.  Then weave the yarn back up to the unfinished loop and pull it through carefully to keep the point of the ear.  Finish weaving in the ends to the shape ear.


Left Ear:  Attach white yarn in 3rd sc from right ear, ch 3, dchdc2tog in next 2 scs, finish like the right ear.


Face Features and Whiskers
Sew button or ribbon onto right ear.


I used 1/8" ribbon and made several loops, spread them and then sewed a small piece of ribbon over the center to make this bow.
 To make this little flower, I used 1/2" ribbon and folded in a fan shape forming a circle and then sewed it together.
Use this picture of Hello Kitty as a guide for placing the eyes and whiskers.  Using felt with an adhesive backing, cut three small ovals.


Peel the paper off the felt and stick it onto the face.

For whiskers thread tapestry needle with black yarn, tie a knot in the yarn and pull it through the back of the Hello Kitty face.  Do this 6 times.  


Flower

With Hot Pink yarn Ch 4,

Rnd 1:  Sc in 2nd ch from hook, sc in next ch, sc 3 times in last ch, sc in back side of next ch, sc in last ch 3 times ( 8 scs)
Rnd 2: Sc in next 3 scs, sc 3 times in next sc, sc in next 4 scs, 3 scs next sc.  (13 scs)
Rnd 3: Sc in next 4 scs, 3 scs in next sc, sc in next 5 scs. 2 scs in next 2 scs. (16 scs)
Rnd 4: Sc in next 5 scs, 2 scs in next 2 scs, sc in next 6 scs, 2 scs in next 2 scs, sl st in next sc. (19 scs)
Rnd 5: *ch 3, sl st in 3rd sc* 6 times, ch 3, sl st in base of beg ch. (7 ch-3 loops)
Rnd 6: *sl st in 1st ch, (ch 3, dc, tr 2 times, dc 2 times) all in same ch-3 sp* 7 times, sl st in base of 1st ch. Fasten off. Weave in ends.


Rnd 7: Attach black yarn in fastened off st, *ch 5, sl st in back of flower petal in sc on Rnd 2 about in the middle of the petal*  7 times, ch 5 sl st in base of beg ch 5.


Rnd 8:  *sl st in ch-5 sp, (sc, hdc, dc, 2 trs, dc, hdc, sc) all in ch-5 sp* 8 times, sl st in base of beg ch-5.  Fasten off.


Assembly

Sew Hello Kitty face to flower.  Cut a length of gold ribbon long enough to wrap around wrist plus 1 ".  Sew Flower down to middle of ribbon with yellow or gold thread.


Fold ends down towards the back of the flower about 1/2" on each side.  Sew on two snaps.


Happy Hooking!

You May Also Like:
Fascinator Hat

Henna Tattoo Inspired Glove
Hello Kitty Locker Mirror


Moogly


button
Petals to Picots